Are you tired of being tethered to your local network, unable to access your Raspberry Pi from anywhere else in the world? Setting up secure and efficient remote access to your Raspberry Pi, even when it's tucked behind a NAT router, is not just possible, it's surprisingly straightforward and offers a wealth of benefits for any tech enthusiast.
The quest to connect to your Raspberry Pi remotely often leads to a frustrating maze of search queries, technical jargon, and complex configurations. The initial aim is often simple: to access your device without being physically present. This could involve anything from checking on a home automation project to managing a media server or even just running a simple script. The fundamental challenge lies in bypassing the Network Address Translation (NAT) of your router, which acts as a barrier, preventing direct access from the outside world. Many solutions exist, some involving Virtual Private Networks (VPNs), others involving complex port forwarding rules. But amongst these, a method using Secure Shell (SSH) stands out for its balance of security, ease of use, and efficiency. By leveraging the power of SSH, you can create a secure tunnel, allowing you to access your Raspberry Pi from any location with an internet connection. The process, while involving some initial setup, once configured, offers a seamless and reliable way to administer your device remotely. This is particularly relevant in an age where remote work and decentralized systems are becoming increasingly common, offering you the flexibility to control your device without the geographical limitations.
To get started, let's address a common challenge: the external IP address of your router. This address is essential, because it is the address your router presents to the outside world. However, the Raspberry Pi is on your local network and has its own IP address, often in the range of 192.168.0.xxx or similar. The objective is to route traffic from the external IP address, specifically on port 22 (the default SSH port), to the Raspberry Pis local IP address. This is where port forwarding comes into play. You will need to log into your router's configuration interface, typically by typing an IP address like 192.168.1.1 or 192.168.0.1 into your web browser, and then enter your admin credentials. From there, you'll navigate to the port forwarding settings and create a rule that forwards traffic on port 22 to the Raspberry Pis local IP address on port 22. Its crucial to understand this process, because without it, all attempts to connect via SSH will fail. Also, remember that the external IP address of your router may change over time, unless you have a static IP address from your internet service provider. For this reason, its often useful to set up dynamic DNS, which associates a domain name with your changing IP address, so that you can connect to your Raspberry Pi using a memorable name, rather than a potentially changing series of numbers.
Now, let's delve into the essential steps needed to establish a secure and robust remote SSH connection. First, it's important to create an SSH key pair. This is a fundamental practice in securing your connection, as it replaces the standard password authentication with a more secure cryptographic key-based authentication. The process involves generating a public and private key pair. The private key is kept securely on your local machine (e.g., your Mac), while the public key is placed on the Raspberry Pi. When you connect via SSH, your client presents its private key, and the server (Raspberry Pi) uses the public key to verify the client's identity. This significantly reduces the risk of unauthorized access, since a stolen password can be easily cracked, whereas the private key is much harder to compromise. The next crucial step involves enabling SSH on your Raspberry Pi. In most recent Raspberry Pi OS distributions, SSH is disabled by default for security reasons. You can do this in several ways. If you have direct access to a monitor and keyboard connected to your Raspberry Pi, you can enable it through the Raspberry Pi configuration application. You'll navigate to the "Interfaces" tab and enable SSH. Alternatively, if you are setting up your Raspberry Pi "headless", i.e., without a monitor or keyboard, you can enable SSH by creating an empty file named "ssh" in the boot partition of your SD card before the first boot. The system will then automatically enable SSH on the first boot, allowing you to connect remotely.
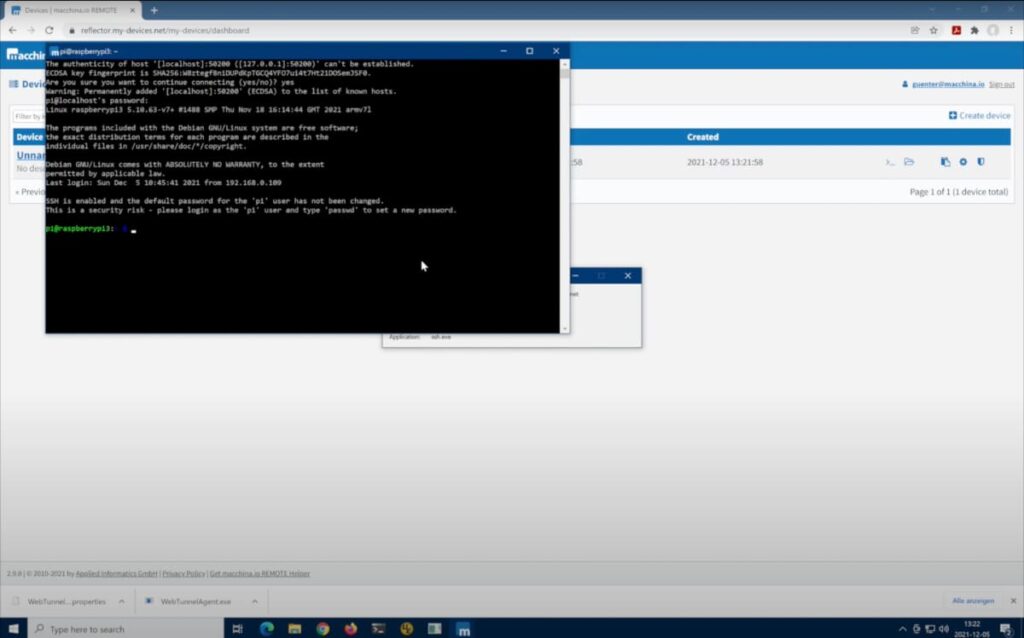
The core of the connection is established through the utilization of your external IP address and port forwarding configuration on your router. Once SSH is enabled, you can use the terminal application on your Mac to connect to your Raspberry Pi from anywhere. The general command format for initiating a remote SSH connection is `ssh [email protected]`, where "username" is the username you use on your Raspberry Pi (the default username is often "pi") and "external_ip_address" is the public IP address of your router. The use of your external IP address directs the connection to your home network, and the configured port forwarding then routes the traffic to the Raspberry Pi. The prompt should ask for the password if you haven't set up key-based authentication. After successful authentication, you will be logged into your Raspberry Pis command-line interface, from which you can execute commands, manage files, and control the device.
For added security, consider several key practices. Change the default password of the "pi" user immediately after your first login. Use strong, unique passwords. Another great option is disabling password authentication altogether and relying solely on SSH key-based authentication. Regularly update your Raspberry Pis operating system and software packages. Outdated software can contain security vulnerabilities that can be exploited. Finally, it's also beneficial to restrict access to your Raspberry Pi by setting up firewall rules, allowing connections only from specific IP addresses. These measures significantly improve the security of your remote SSH connection.
| Feature | Details |
|---|---|
| Benefits of SSH | Provides a secure and efficient method to administer your Raspberry Pi remotely. |
| Initial Setup Security | Enables SSH securely during initial setup to ensure remote access is protected from the outset. |
| IP Address Acquisition | Outlines the process of finding your Raspberry Pis IP address on your local network, crucial for connecting. |
| Router Configuration | Details the steps needed to configure a NAT router, including port forwarding to enable access. |
| Enabling SSH | Explains how to enable SSH on a Raspberry Pi through various methods, including the configuration application and headless setup. |
| SSH Command Structure | Provides the correct syntax for the SSH command to initiate a secure remote connection. |
| Security Practices | Recommends several security measures, like changing default passwords, using SSH key-based authentication, and regularly updating software. |
| Alternative Tools | Highlights Tailscale as an excellent option for remotely accessing your Raspberry Pi, eliminating the need for extensive configuration. |
Beyond the basic setup, there are alternative solutions to consider, such as using a VPN or a service like Tailscale. A VPN allows you to create a secure connection to your home network, but it often involves a more involved setup, requiring you to configure the VPN server on your router or install a VPN client on your Raspberry Pi. However, VPNs offer a great deal of security as well. Tailscale, on the other hand, offers a streamlined approach to this, by using a mesh VPN that creates a secure network between your devices without the need for complex router configuration. Tailscale effectively creates a private network. Once installed and configured on both your Mac and Raspberry Pi, Tailscale assigns unique IP addresses to each device, allowing them to communicate securely, regardless of their location. This is often a preferable option for beginners or those who want to avoid the complexities of port forwarding and router configuration. Tailscale has the advantage of being easy to set up and use. For those who desire an accessible and user-friendly approach to remote access.
The process of accessing your Raspberry Pi remotely offers a wealth of benefits. SSH becomes indispensable for administering your Pi projects. It allows you to make updates, run scripts, manage files, and monitor system performance, without being physically present. This is extremely beneficial if the Raspberry Pi is being used in a project that runs in a different location, such as a home automation system, a media server, or a scientific project. Another major benefit is the security that SSH provides. By encrypting the communication between your device and the Raspberry Pi, SSH protects your data from potential eavesdropping. This is a great advantage over protocols that do not offer such security, as it protects sensitive information from being intercepted and stolen. Moreover, SSH offers a high degree of efficiency. Once connected, you can work from the command line. You can execute commands, transfer files, and control the device in real-time. This makes SSH a powerful tool. For these reasons, SSH is used by a broad array of people, including those managing servers, those working on software development, and those who simply enjoy the flexibility that it offers for accessing their devices remotely.
So, how do you set up Tailscale on your Raspberry Pi? First, you will need to access your Raspberry Pi, whether via a local terminal or via SSH. Next, you'll run the installation script from the official Tailscale website. The script automatically installs and configures the Tailscale software on your Raspberry Pi. Once installed, you will need to authenticate your Raspberry Pi with your Tailscale account. When you run the Tailscale up command, you will be prompted to visit a URL to authorize the device. After authorizing, the Raspberry Pi will connect to the Tailscale network. Finally, you can access your Raspberry Pi via its Tailscale IP address. Tailscale will assign a unique IP address to your Raspberry Pi. You can then use this IP address in your SSH client (e.g., the terminal on your Mac) to connect to your Raspberry Pi from anywhere. This eliminates the need for port forwarding, because Tailscale manages the network routing. The installation on your Mac is just as straightforward. You'll download and install the Tailscale client on your Mac. Once installed, you log in to your Tailscale account. Then, you will see your Raspberry Pi listed in the Tailscale interface, allowing you to connect to it through the Tailscale IP address.
Regardless of the method you choose whether it is SSH with port forwarding or a solution like Tailscale setting up remote access to your Raspberry Pi provides a significant advantage. Its a practical tool that enhances your productivity, increases the utility of your devices, and enhances the security of your projects. While the initial setup may require some effort, the benefits of remote access, in terms of efficiency, security, and convenience, make it a worthwhile endeavor. Whether you're a seasoned developer, a hobbyist, or a beginner, the ability to remotely manage and monitor your Raspberry Pi projects is invaluable in today's interconnected world.